一些虚拟机获取 shell 的方法

Catalpa 网络安全爱好者

前端时间碰到一些网络设备,它们可以以虚拟机形式进行安装部署,在分析此类设备的时候,获取一个 root shell 会更加方便,但是大部分设备镜像中都设置了自定义的 cli 作为 jail,防止用户直接访问到 linux sh,提高设备安全性。现总结一些获取虚拟机设备 root shell 的方法,分享给大家。

shell 提权

某些设备没有内置自定义的 cli 程序,但是它们默认提供的 shell 权限较低,此时可以考虑通过某些历史漏洞进行提权,获取 root 权限,例如前段时间爆出的 sudo 堆溢出漏洞等,由于设备内核版本普遍不高,一般都可以成功提权。

cli 自带的功能

为了更方便的维护设备,cli jail 中可能会添加一些特殊的命令,通过执行这些命令就能获取 linux sh,以 Citrix Netscaler 为例,其 cli 提供了 shell 命令,直接执行就可以获取 linux shell

另外例如 check point Gateway,可使用 set expert-password 设置专家模式密码,然后用 expert 命令进入专家模式,所谓专家模式就是 linux root shell。
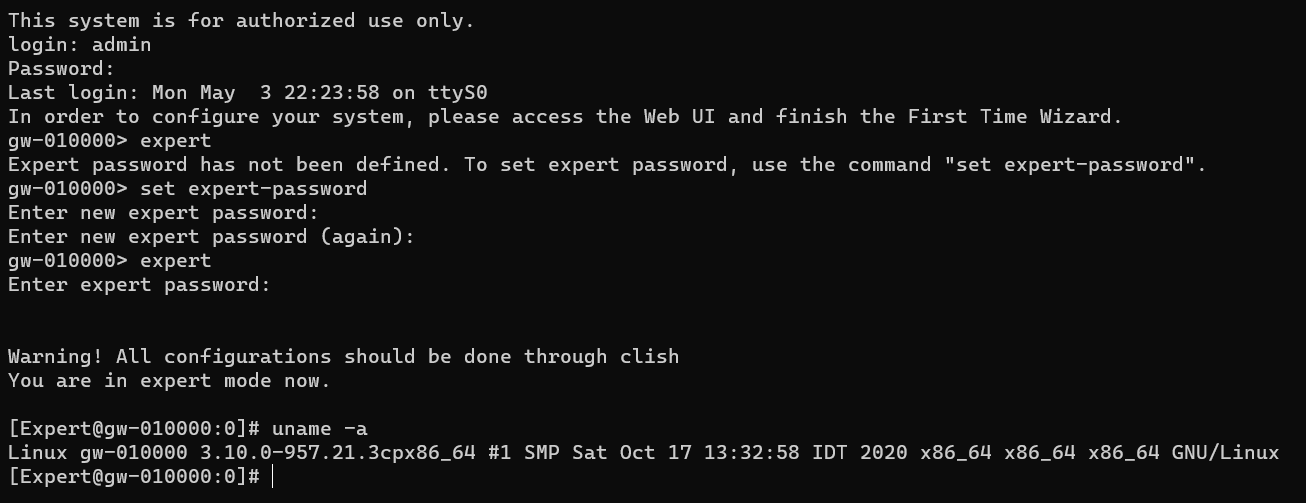
所以遇到一款新设备应该先查看其 cli 命令手册,看看是否存在能够直接获取 root shell 的命令。

利用历史漏洞获取 shell

通过查看历史 CVE 或官方漏洞通告信息,可以发现一些 cli jail 存在命令注入/逃逸的问题,通过利用这些历史漏洞就能拿到 linux shell。

参考资料

解包修改文件系统

前提:磁盘文件没有加密

cli jail 背后对应着某个程序,通过解包文件系统,我们可以尝试修改这个 jail 程序或者直接在初始化脚本等位置添加代码,例如启动 telnet 或者反弹 shell 来实现逃逸。

需要注意的是系统可能对 file system 进行检测,如果发现文件被修改则拒绝启动,此时有两种解决方案。

  1. 修改 vmtools 相关文件,位于 /etc/vmware-tools 目录下的 vmtools 脚本文件属于第三方代码,厂商可能不会对它们进行检查。
  2. 修改文件系统检测程序,这种方式需要对程序进行逆向分析,尝试定位具体的检查逻辑。

rbash 逃逸思路

某些 cli jail 中可使用部分正常的 linux 命令,例如 find、more 等,方便用户操作,其中某些 linux 命令可用于逃逸,例如 find 的 exec 参数

1
find / -exec /bin/bash \;

more 的 subshell,在交互式界面使用感叹号执行命令

1
2
3
4
5
6
7
8
9
10
11
12
13
14
15
16
17
18
19
20
21
22
23
24
25
26
27
28
29
catalpa@CataLpa:/$ cat /bin/bash | more
ELFxxxxxxxx
--More-- // press h
Most commands optionally preceded by integer argument k. Defaults in brackets.
Star (*) indicates argument becomes new default.
-------------------------------------------------------------------------------
<space> Display next k lines of text [current screen size]
z Display next k lines of text [current screen size]*
<return> Display next k lines of text [1]*
d or ctrl-D Scroll k lines [current scroll size, initially 11]*
q or Q or <interrupt> Exit from more
s Skip forward k lines of text [1]
f Skip forward k screenfuls of text [1]
b or ctrl-B Skip backwards k screenfuls of text [1]
' Go to place where previous search started
= Display current line number
/<regular expression> Search for kth occurrence of regular expression [1]
n Search for kth occurrence of last r.e [1]
!<cmd> or :!<cmd> Execute <cmd> in a subshell
v Start up /usr/bin/vi at current line
ctrl-L Redraw screen
:n Go to kth next file [1]
:p Go to kth previous file [1]
:f Display current file name and line number
. Repeat previous command
-------------------------------------------------------------------------------
!uname -a
Linux CataLpa 4.4.0-19041-Microsoft #488-Microsoft Mon Sep 01 13:43:00 PST 2020 x86_64 x86_64 x86_64 GNU/Linux
------------------------

less 的 MISCELLANEOUS COMMANDS,可以使用 !command 或 |Xcommand 等执行命令

1
2
3
4
5
6
7
8
9
10
11
12
13
14
15
16
---------------------------------------------------------------------------

MISCELLANEOUS COMMANDS

-<flag> Toggle a command line option [see OPTIONS below].
--<name> Toggle a command line option, by name.
_<flag> Display the setting of a command line option.
__<name> Display the setting of an option, by name.
+cmd Execute the less cmd each time a new file is examined.

!command Execute the shell command with $SHELL.
|Xcommand Pipe file between current pos & mark X to shell command.
s file Save input to a file.
v Edit the current file with $VISUAL or $EDITOR.
V Print version number of "less".
---------------------------------------------------------------------------

还有一些方法可参考此文章

虚拟机调试

blackhat DEVCORE 团队成员的议题中提到的一种方法。首先要大概了解 linux 系统的启动引导流程,详情可以参考此文章。简单来说,Linux 启动时,主要做了以下操作:

  1. BIOS 运行,执行 POST,硬件自检。
  2. 硬件自检通过,BIOS 在磁盘查找引导记录,并加载到内存执行 (MBR)。
  3. 引导记录启动引导加载器,常用的加载器包括 GRUB、GRUB2、LILO 等。
  4. 引导加载器在磁盘寻找内核文件并装载到内存,将控制权转移到内核继续执行。
  5. 内核通常是自解压文件,文件名带有 vmlinuz 前缀,内核负责完成剩余的启动流程。

关键在于 vmlinuz 内核初始化操作中,详细流程可参考此文章

在初始化流程中最后一步,内核会执行 init_post 函数,此时内核初始化接近尾声,此函数主要用于启动用户空间中的 init 进程,代码如下

1
2
3
4
5
6
7
8
9
10
11
12
13
14
15
16
17
18
19
20
21
22
23
24
25
26
27
28
29
30
31
32
33
34
35
36
37
38
static int noinline init_post(void)  
{
free_initmem();
unlock_kernel();
mark_rodata_ro();
system_state = SYSTEM_RUNNING;
numa_default_policy();

if (sys_open((const char __user *) "/dev/console", O_RDWR, 0) < 0)
printk(KERN_WARNING "Warning: unable to open an initial console.\n");

(void) sys_dup(0);
(void) sys_dup(0);

if (ramdisk_execute_command) {
run_init_process(ramdisk_execute_command);
printk(KERN_WARNING "Failed to execute %s\n",
ramdisk_execute_command);
}

/*
* We try each of these until one succeeds.
*
* The Bourne shell can be used instead of init if we are
* trying to recover a really broken machine.
*/
if (execute_command) {
run_init_process(execute_command);
printk(KERN_WARNING "Failed to execute %s. Attempting "
"defaults...\n", execute_command);
}
run_init_process("/sbin/init");
run_init_process("/etc/init");
run_init_process("/bin/init");
run_init_process("/bin/sh");

panic("No init found. Try passing init= option to kernel.");
}

我们可以看到在函数末尾包含 4 个 run_init_process,分别尝试执行 /sbin/init、/etc/init、/bin/init、/bin/sh,通常文件系统中都会包含 /sbin/init,它会作为用户空间的第一个进程执行剩余的初始化操作。

所以,如果我们能够修改 run_init_process 的参数,例如将 /sbin/init 修改成 /bin/sh,或者劫持内核的流程到 run_init_process(“/bin/sh”),可能就会得到一个 linux shell。

为了实现上述操作,要解决几个问题。

如何对内核进行 debug

vmware workstation 提供了虚拟机调试接口,官方文档指出只需要在虚拟机的 vmx 文件中添加以下选项,即可在外部使用 gdb 附加到虚拟机上,从而实现对虚拟机的调试

1
2
3
4
5
6
debugStub.listen.guest64 = "TRUE"
debugStub.listen.guest64.remote = "TRUE"
debugStub.port.guest64 = "12345"
debugStub.listen.guest32 = "TRUE"
debugStub.listen.guest32.remote = "TRUE"
debugStub.port.guest32 = "12346"

如何定位 init_post 函数代码

某些设备 vmdk 未加密,可以直接从中解出 vmlinuz 内核文件,通过解压 vmdk 文件获取 vmlinuz 内核。

获取内核之后需要进一步处理,将格式转换为 elf 方便分析,已经有大佬开发了工具 vmlinux-to-elf,直接转换即可。

修复的内核用 IDA 分析,搜索字符串能够定位 /sbin/init,交叉引用记下 init_post 函数的地址。

如果 vmdk 无法解出内核文件,请参考下文。

修改内存

以 fortiweb 虚拟机为例,首先在 vmware 中导入 ovf 文件,如图
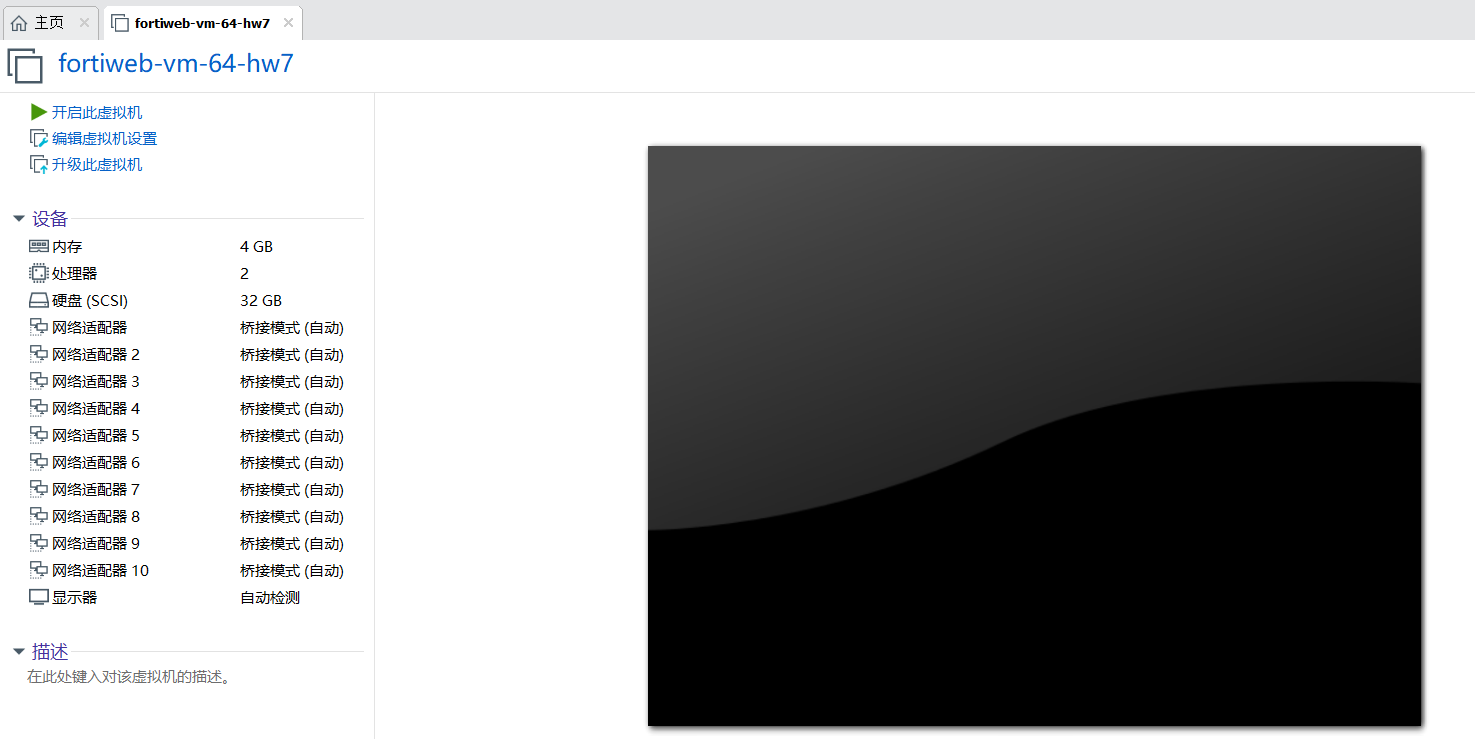
虚拟机库中选择导入的虚拟机,右键打开虚拟机目录,找到 .vmx 配置文件,用文本编辑器打开。

在文件末尾添加配置并保存

1
2
3
4
5
6
debugStub.listen.guest64 = "TRUE"
debugStub.listen.guest64.remote = "TRUE"
debugStub.port.guest64 = "12345"
debugStub.listen.guest32 = "TRUE"
debugStub.listen.guest32.remote = "TRUE"
debugStub.port.guest32 = "12346"

在宿主机打开终端,开启 gdb。windows 下推荐使用 wsl,在 wsl 中启动 gdb 即可。

vmware 启动虚拟机,同时在 gdb 中执行命令

1
target remote 0:12345

注:附加的时间要仔细调整,太早会由于调试桥的原因导致 gdb 附加失败,太晚又会错过 init_post 阶段。

当出现以下信息说明附加正确。

大多数内核中地址都形如 0xffffffff8xxxxxxx。附加成功后根据之前得到的 init_post 函数地址下断点,然后继续运行。如果无法获得内核文件,可以直接从内存中搜索,执行命令

1
find 0xffffffff80000000, 0xffffffff81000000, "/sbin/init"

如果提示 Unable to access 16010 bytes,说明开始地址太小,可逐渐调整直到能够正常搜索。

如果搜索正确会出现以下信息

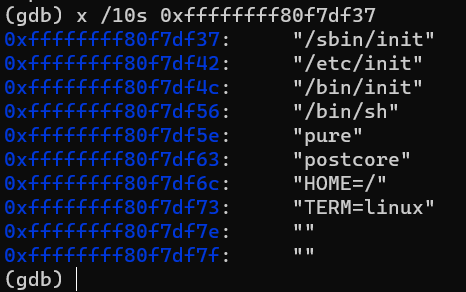
查看此处内存内容

1
x /10s 0xffffffff80f7df37

修改字符串信息

1
set {char [8]} 0xffffffff80f7df37 = "/bin/sh"

之后 continue 让内核继续执行,如果操作无误就得到一个 linux shell。

需要注意的是由于我们修改了用户空间的 init 为 sh,所以此时系统是没有完全初始化的,现在可进行固件导出操作,也可以尝试修改 vmtools 或者其他操作来在下一次开机时获取完整的 shell。

Reference

Attacking NextGeneration Firewalls

Linux Restricted Shell Bypass

Linux启动流程解析:init_post函数

Linux 开机引导和启动过程详解

vmlinux-to-elf

Infiltrating Corporate Intranet Like NSA

  • Title: 一些虚拟机获取 shell 的方法
  • Author: Catalpa
  • Created at : 2021-05-12 00:00:00
  • Updated at : 2024-10-17 08:56:10
  • Link: https://wzt.ac.cn/2021/05/12/vm_shell/
  • License: This work is licensed under CC BY-SA 4.0.